How to Install a Mantel Over a Brick Fireplace
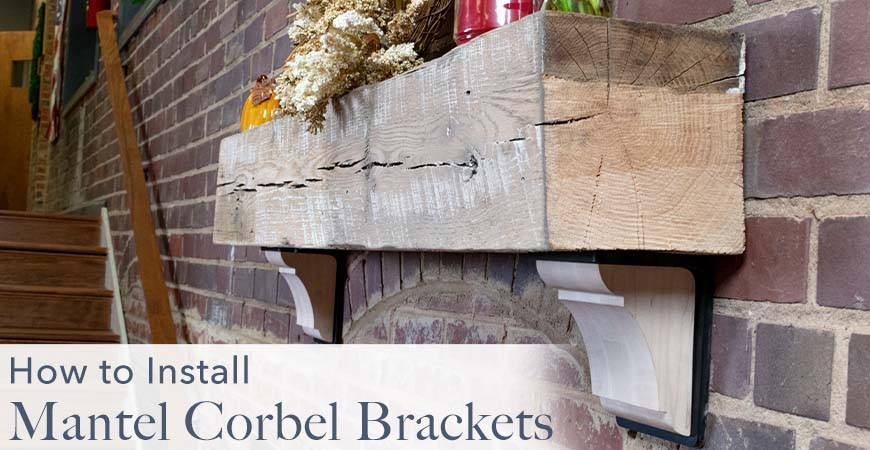
How To Install a Mantel Corbel Over a Brick Fireplace
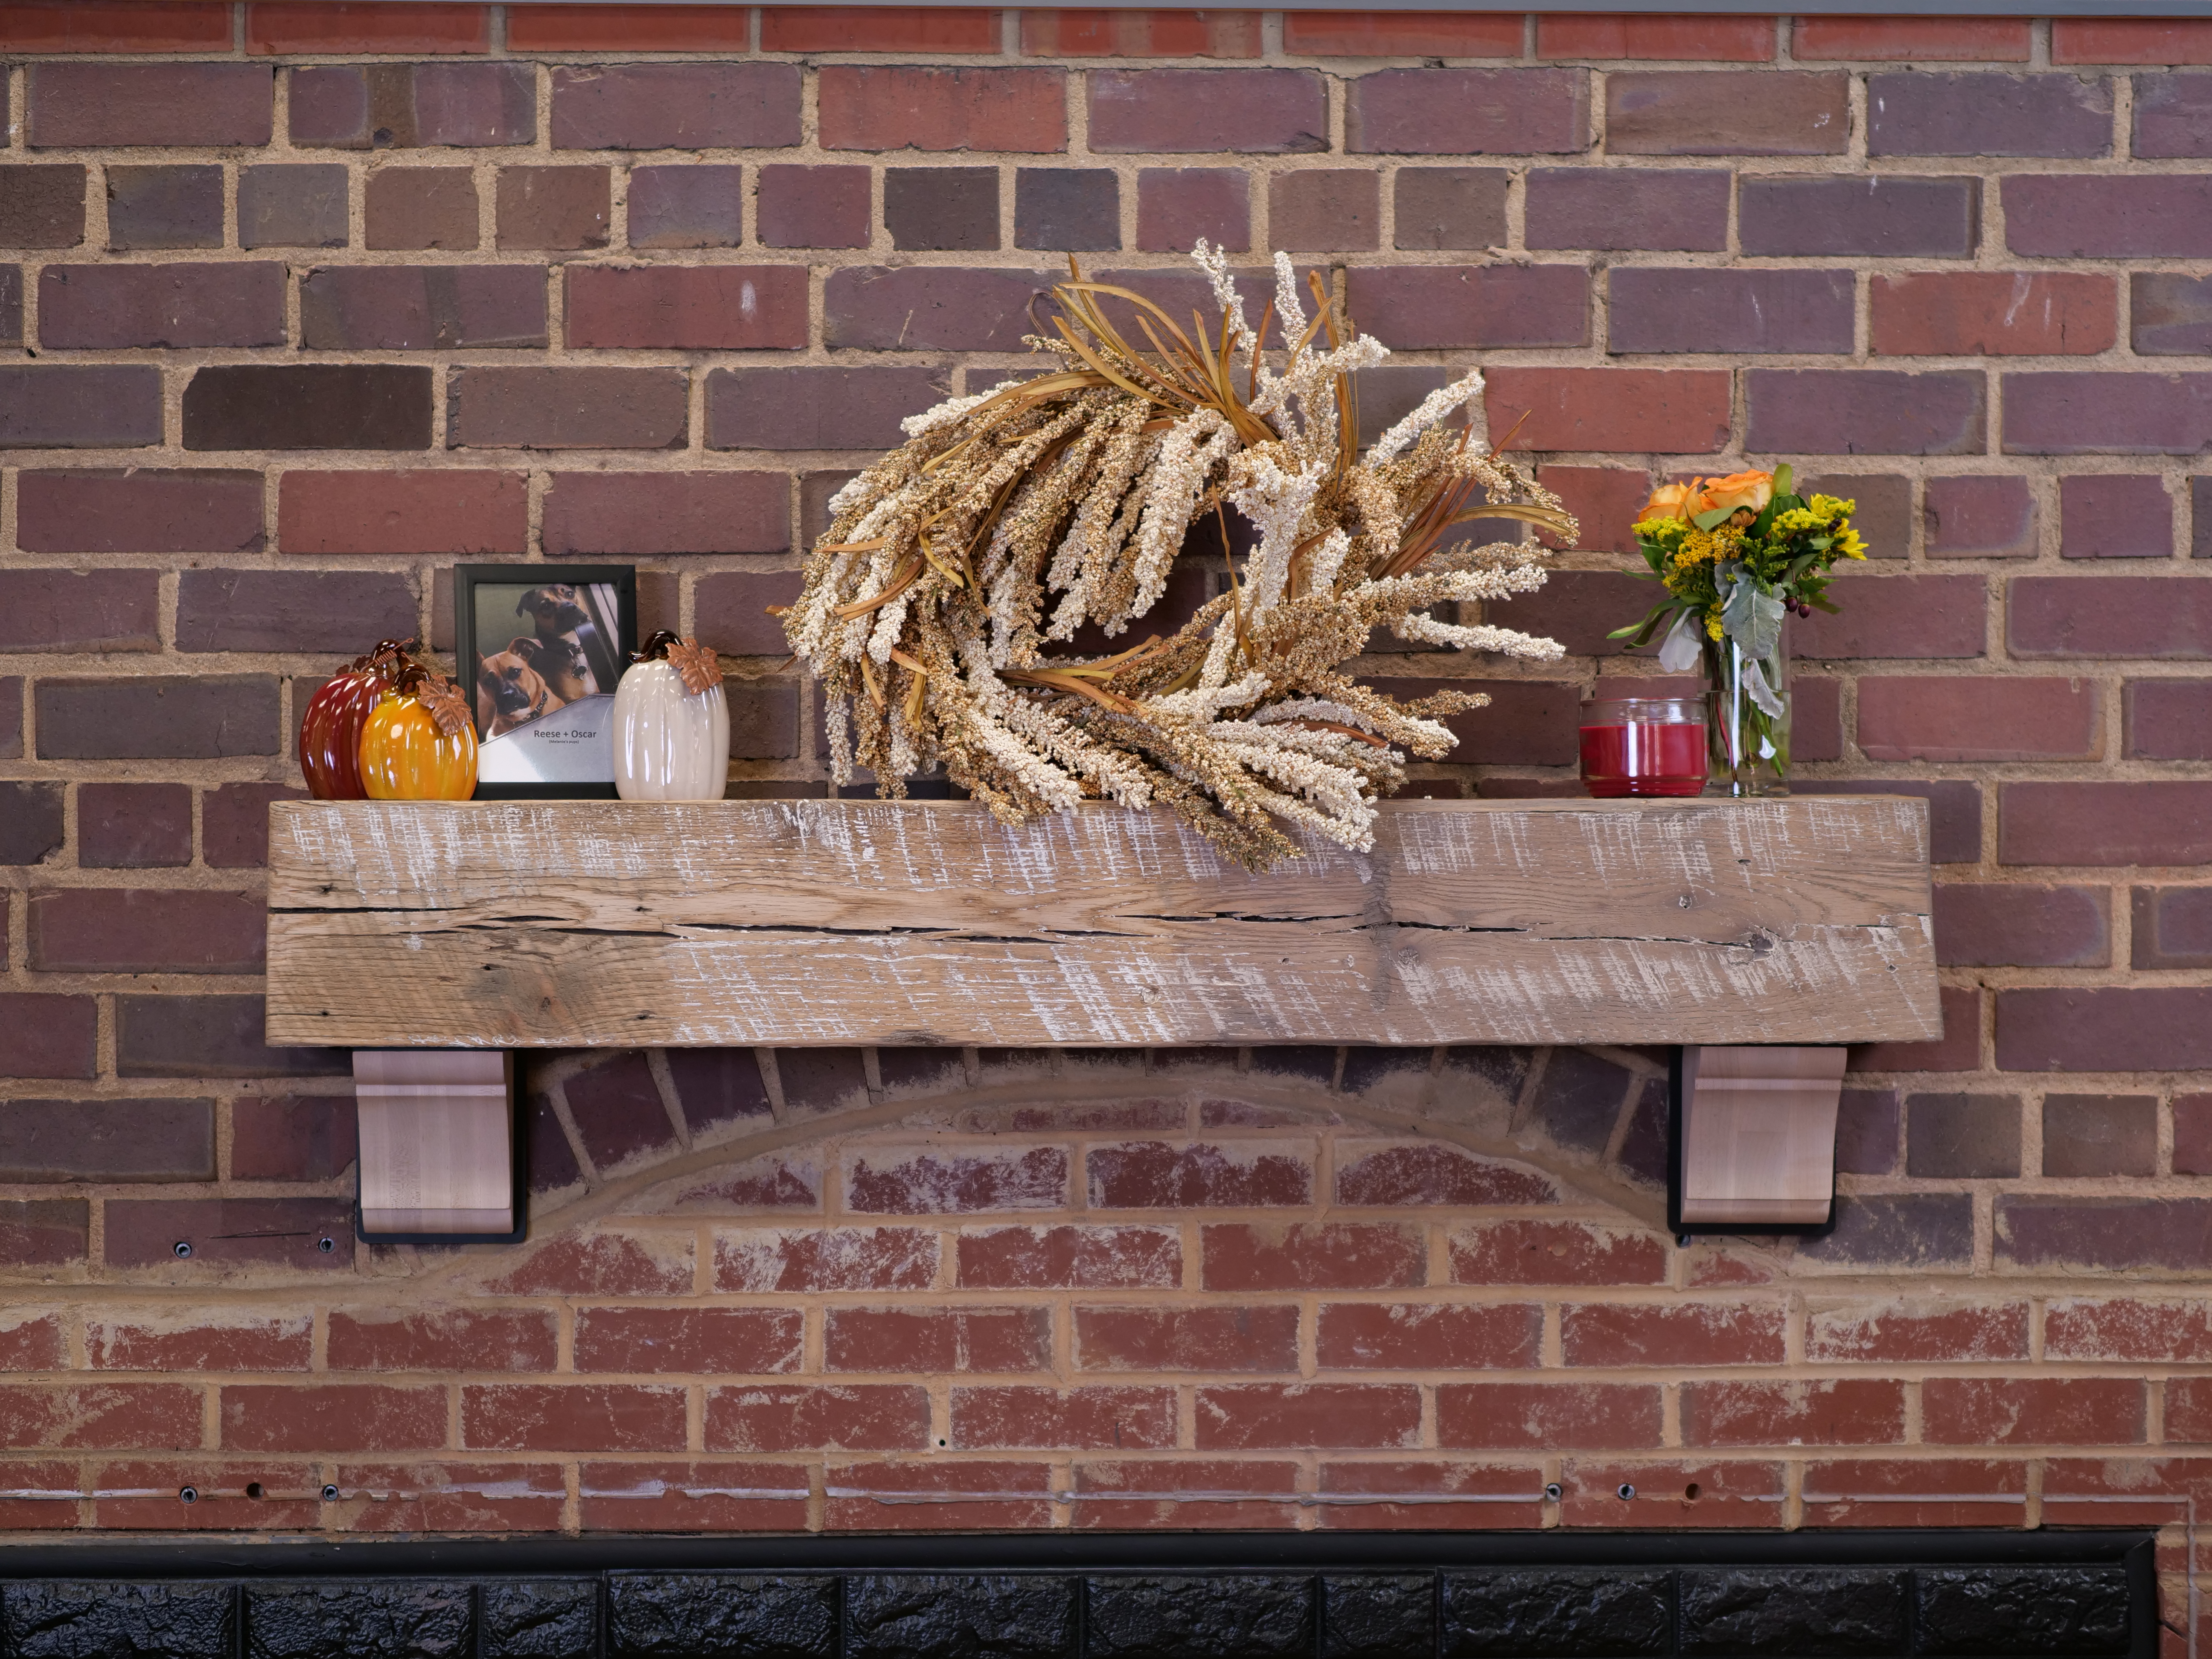
Throughout history, the fireplace has been the heart of the home. Today, little has changed. Fireplaces provide warmth and encourage gatherings of loved ones. Meanwhile, a handsome mantel adds an element of personalization to your home’s hearth and is a timeless addition to any home fireplace.
Luckily, mantel installation is simple with this how-to guide. So whether you’re looking to install your new mantel and corbels into wood studs, or straight into the brick, we have you covered. In a few easy steps, you will have a stylish mantel that stands out as your living room's focal point.
Why Choose a Mantel with Corbels
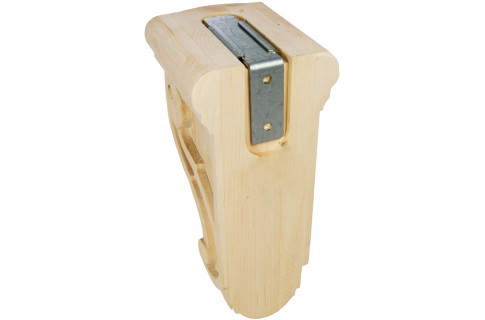
What exactly is a corbel? The word is derived from the Latin “corvus,” meaning “raven,” and references a raven’s distinctive beak shape. Today these supportive brackets are still popular additions to fireplace mantels. While adding corbels to your mantel design is ultimately a personal choice, their addition has multiple benefits.
Corbels add a traditional and timeless look to your mantel. They accentuate your fireplace, the mantel itself, and the items displayed on your mantel. These beautifully carved mantel accessories can also be a piece of art themselves.
In addition to the aesthetic benefits of corbels, they also play an important role in weight distribution and support. Depending on what you plan to display on your fireplace mantel, the extra carry capacity corbels provide makes a significant difference in stability. With corbels, you can be sure your mantel will stay put for generations to come.
Preparing to Install a Mantel with Mantel Corbels
Before you begin, be sure to gather all the necessary items and tools for installation. These include the mantel and corbels, a drill with a 3/16” drill bit, a measuring tape, a level, a pencil, wall anchors, silicone, and appropriately sized countersunk fasteners.
If installing into brick or masonry, you will also need masonry drill bits for your power drill, lag bolts and shields at least 2” long, and a caulking gun.
Once you have your materials ready, you will want to choose an appropriate location and height for your fireplace mantel. While the minimum distance between the firebox and mantel bracket depends on mantel depth, be sure to allow at least 15” between the two.
You also want to be sure your mantel brackets are spaced no more than 40” away from each other for maximum stability. To choose the exact placement for your mantel installation, use a tape measure and mark your intended spot with light pencil marks.
If you are replacing a fireplace mantel, you may choose to hang it in the approximate location of the previous mantel. In this case, be sure the substructure you are installing into is structurally sound before proceeding.
Installing Mantel Brackets Into Sheetrock
In some cases, you may be able to mount your mantel directly into wall studs. In this case, you will want to locate wall studs that are directly tied to the roof or floor of your home. Also, if you’re installing into a stud frame, be sure to tie two studs together so the holes will align with the stud.
For the rest of this guide, we will be focusing on installing a mantel on a brick fireplace. However, once you have drilled your pilot holes, the process is similar to installing corbels into wood studs.
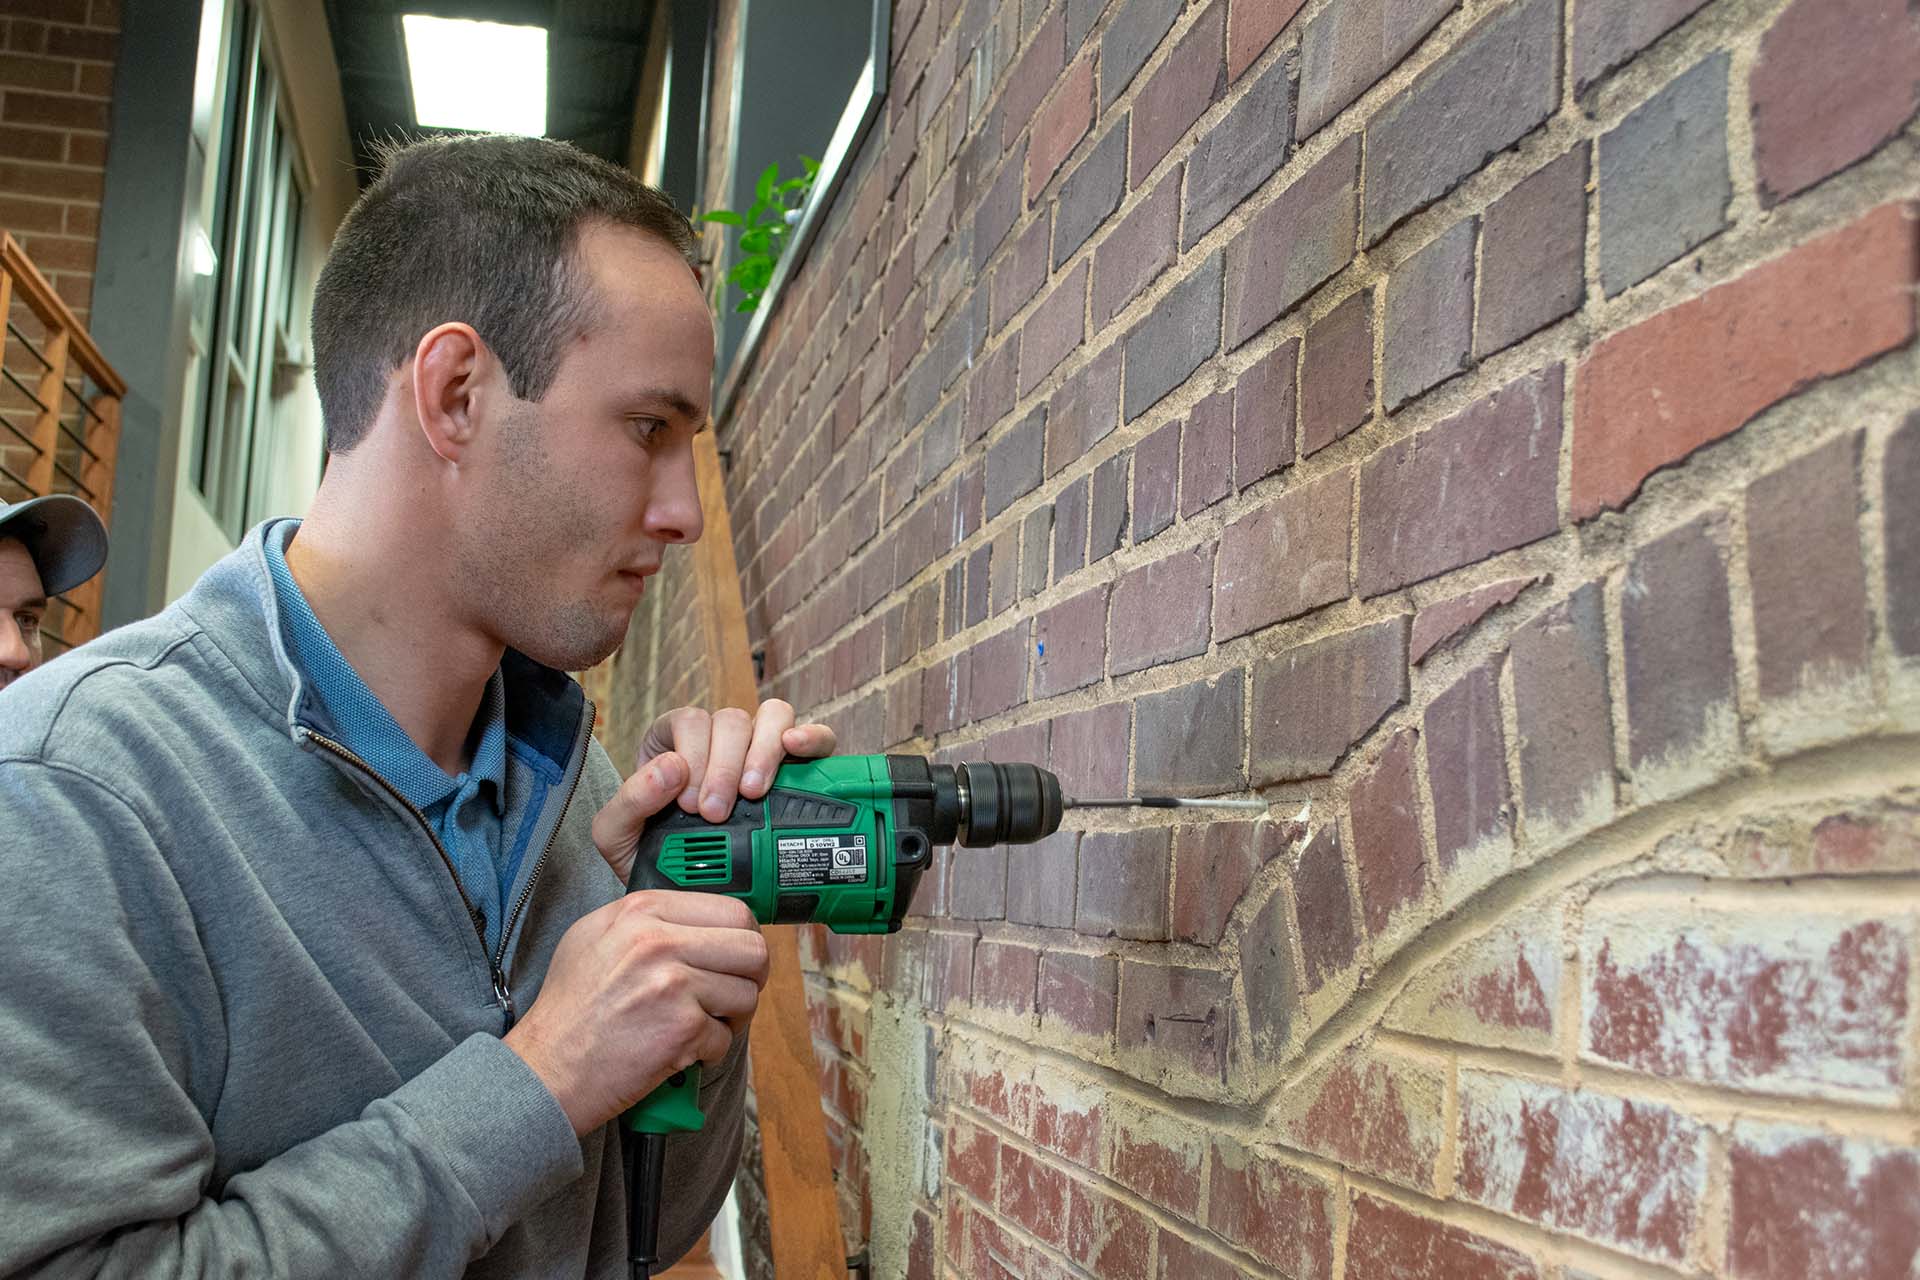
Installing Mantel Brackets into Brick and Mortar
Now that you know where you want your fireplace mantel with corbels, you can move forward with installation.
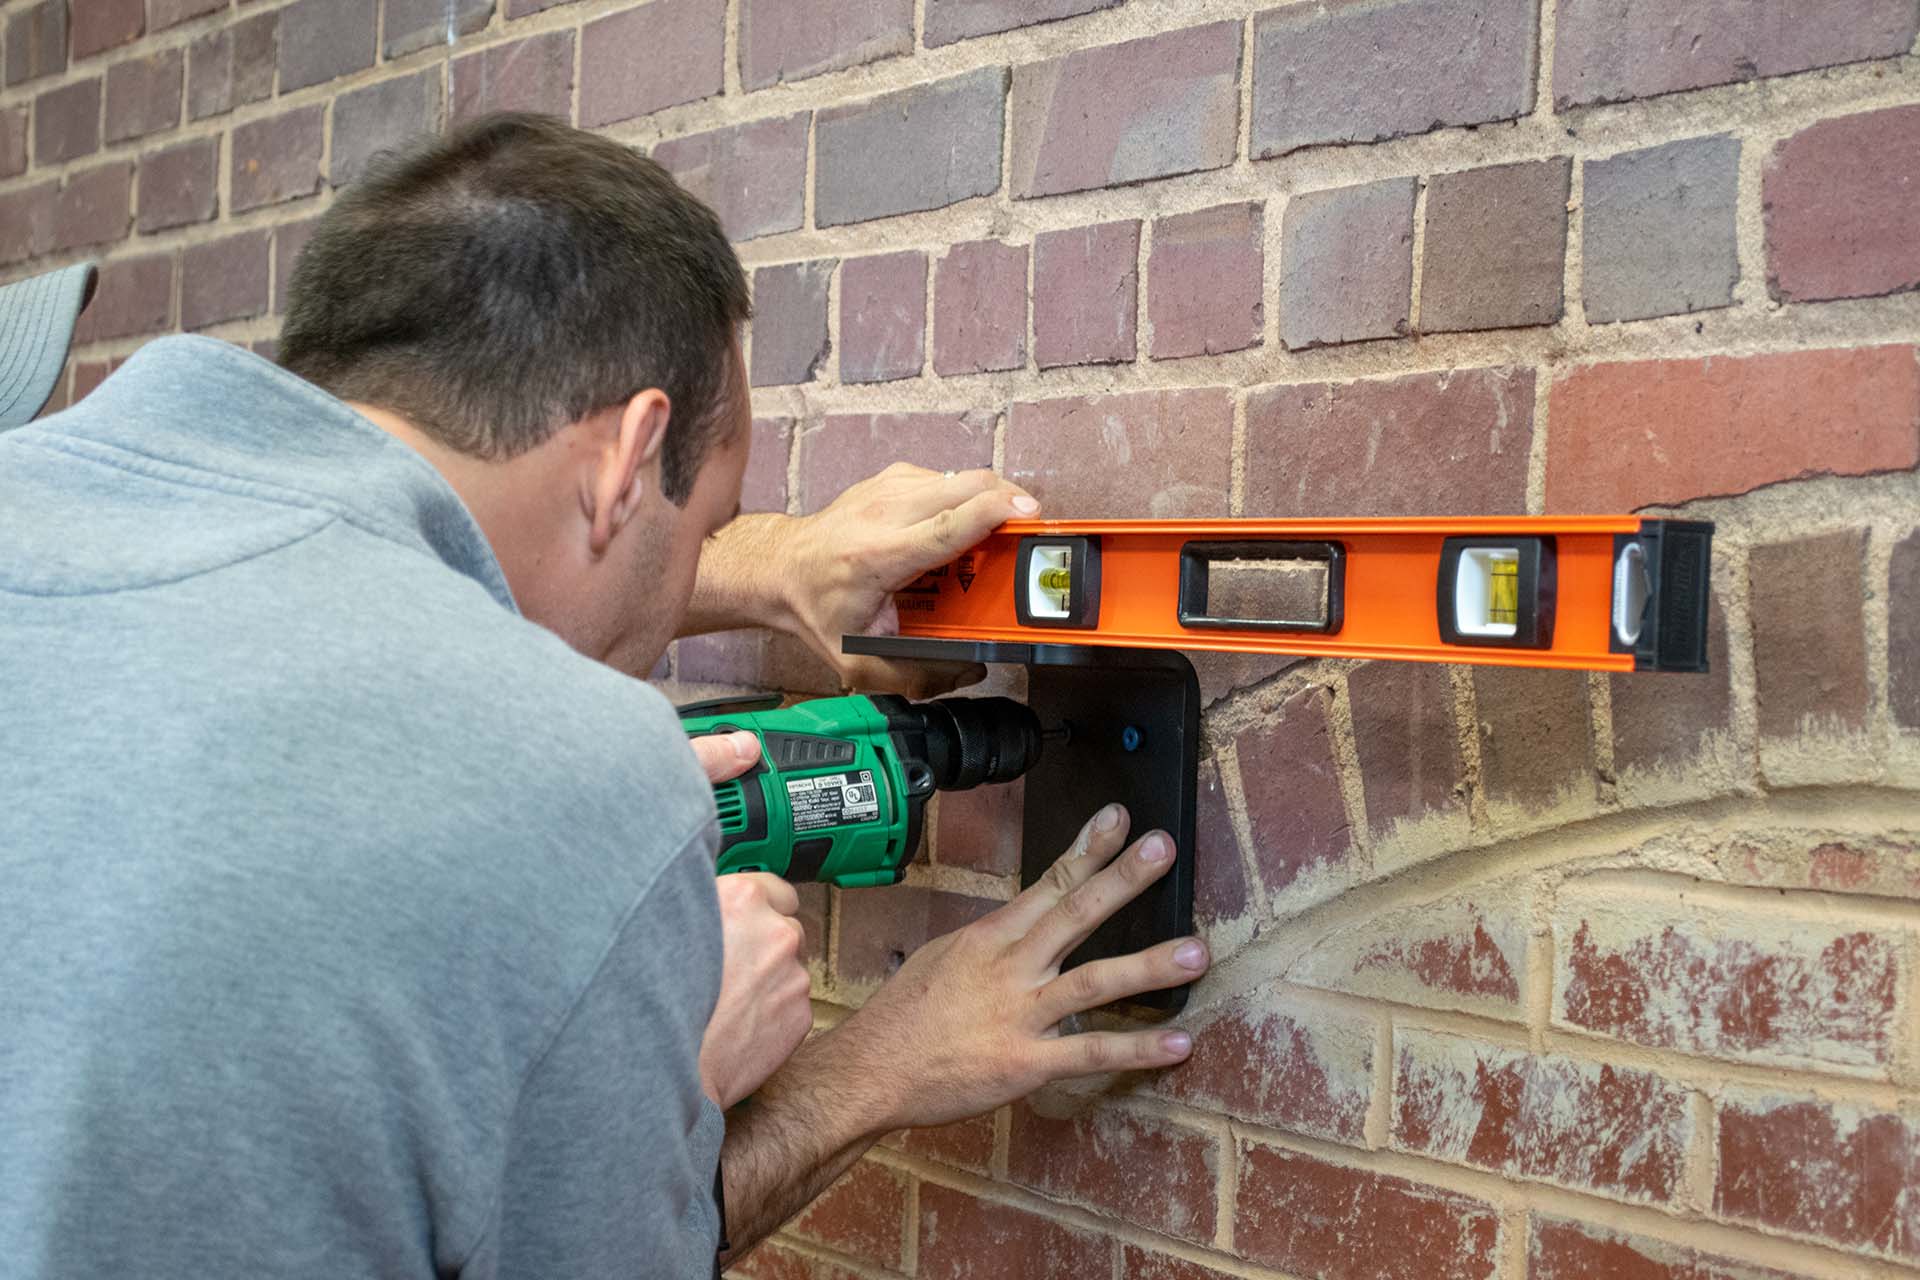
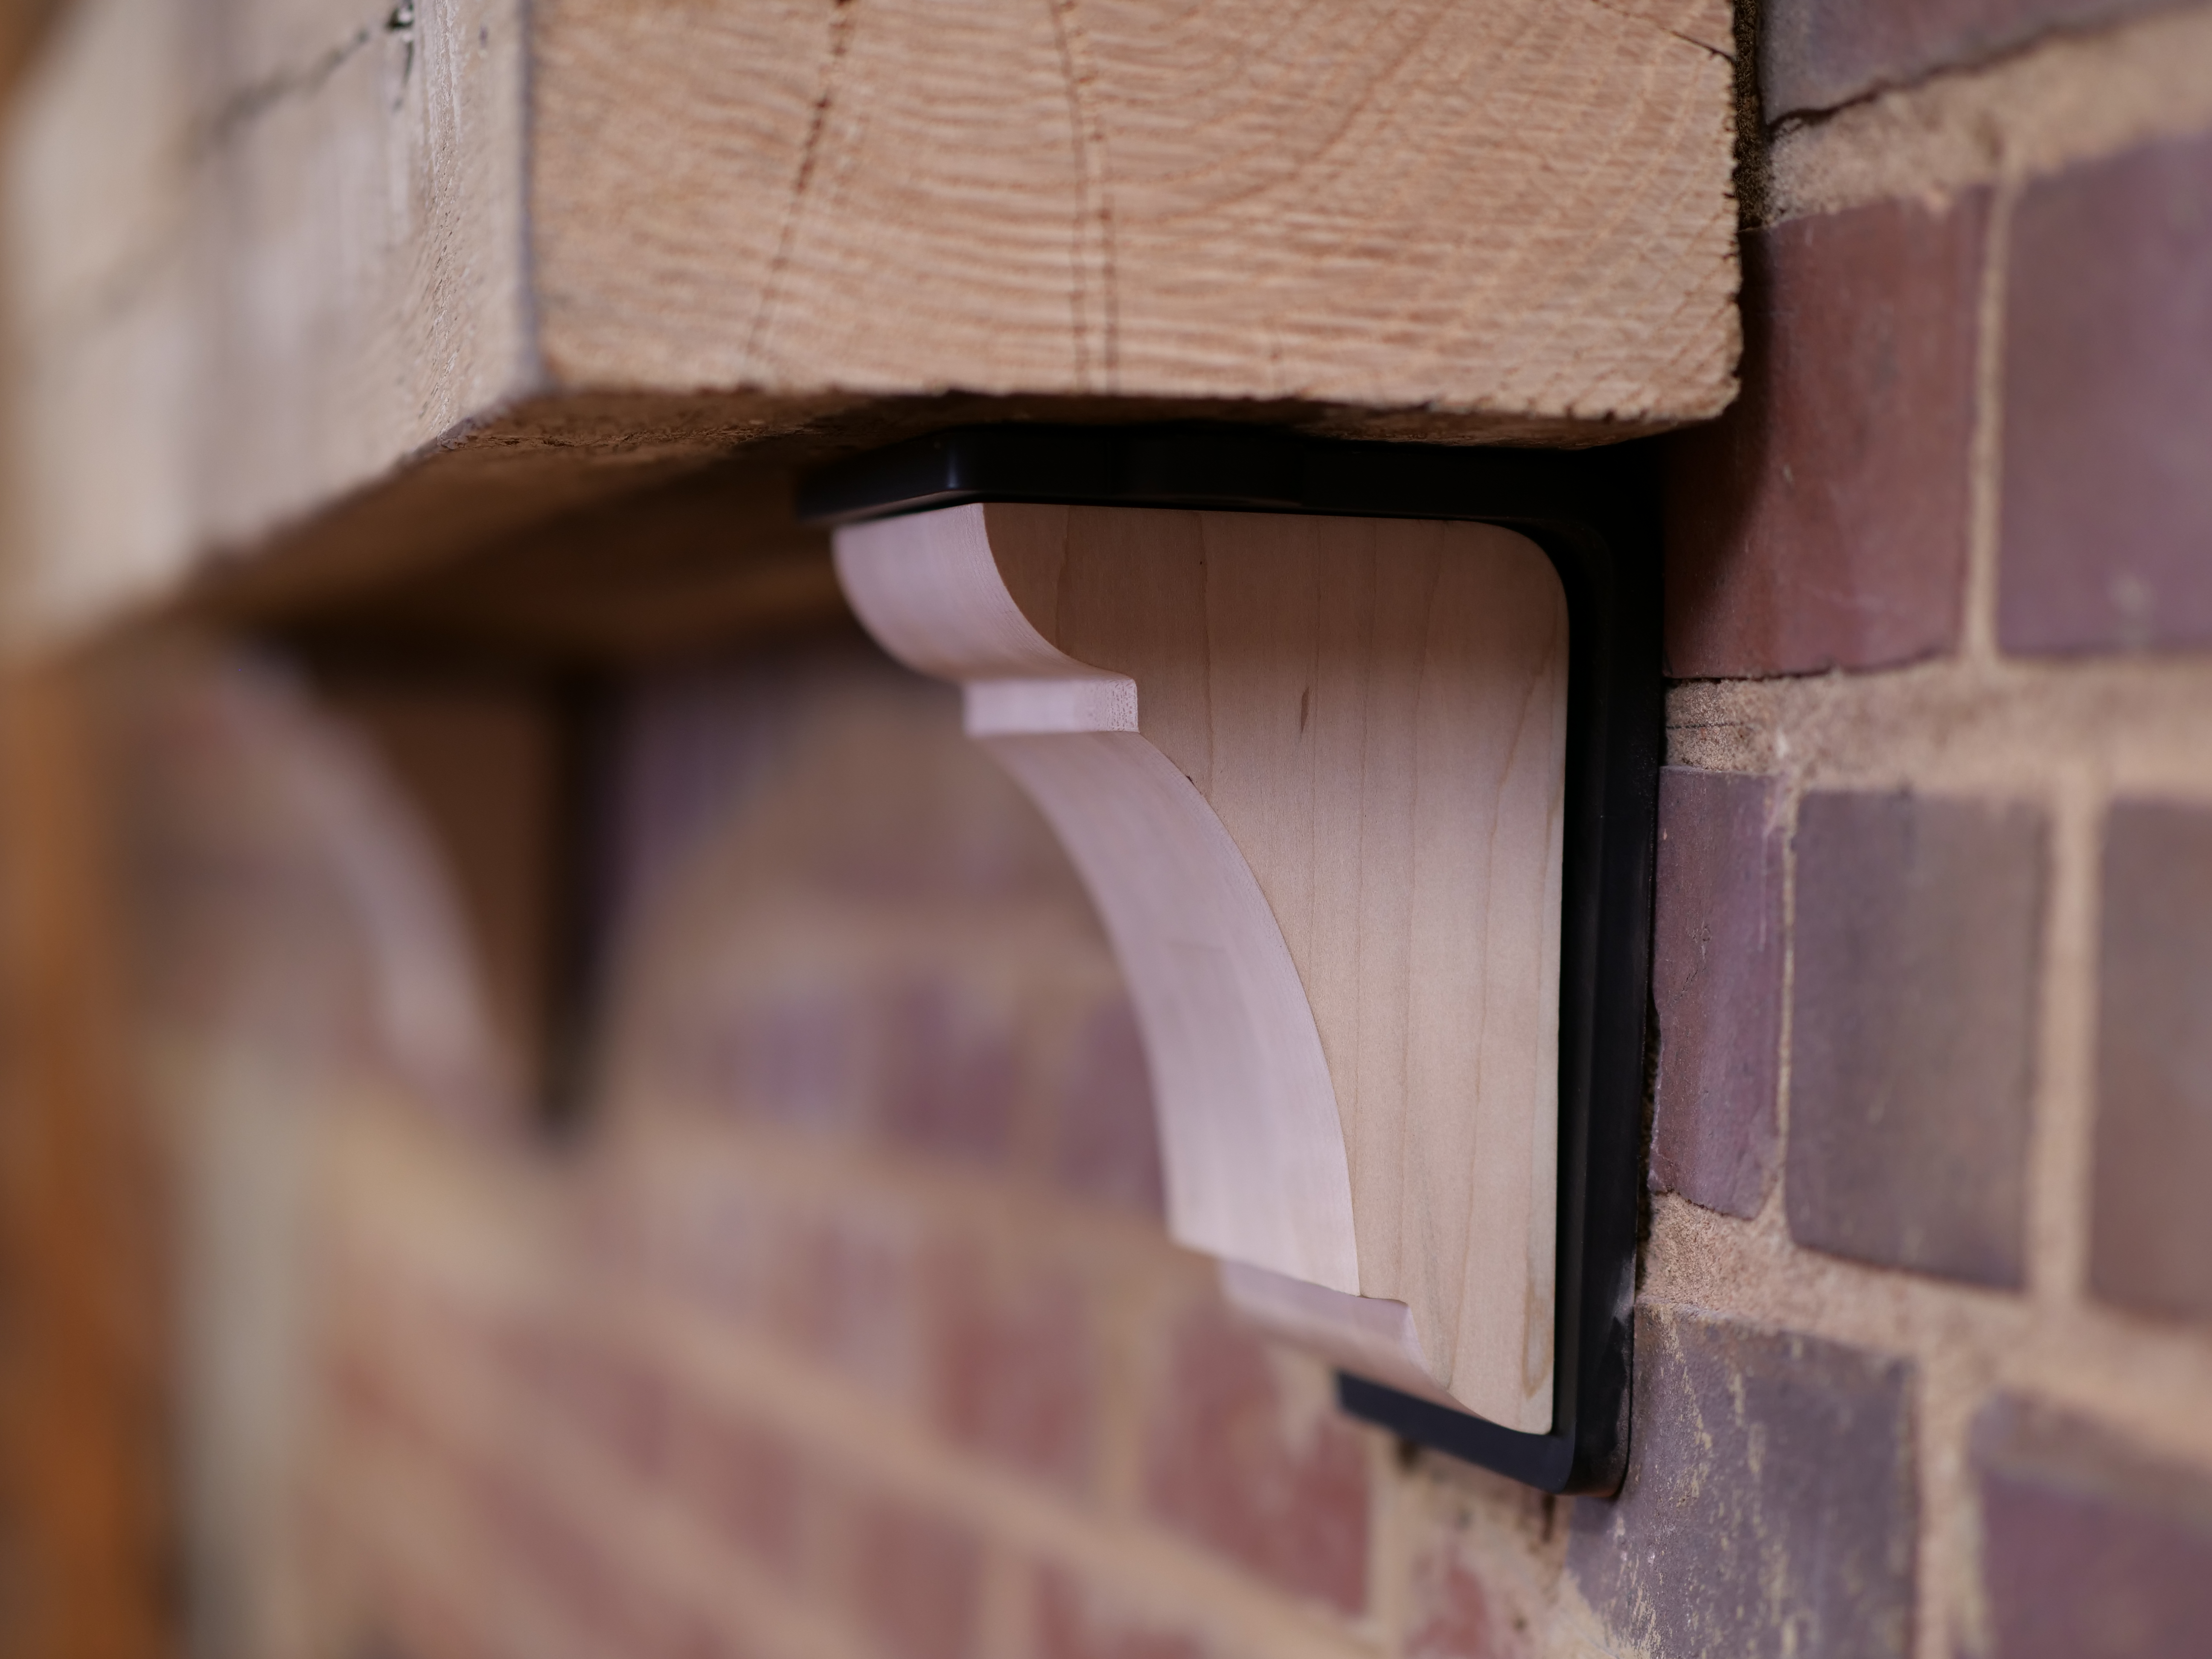
Mounting the Brackets
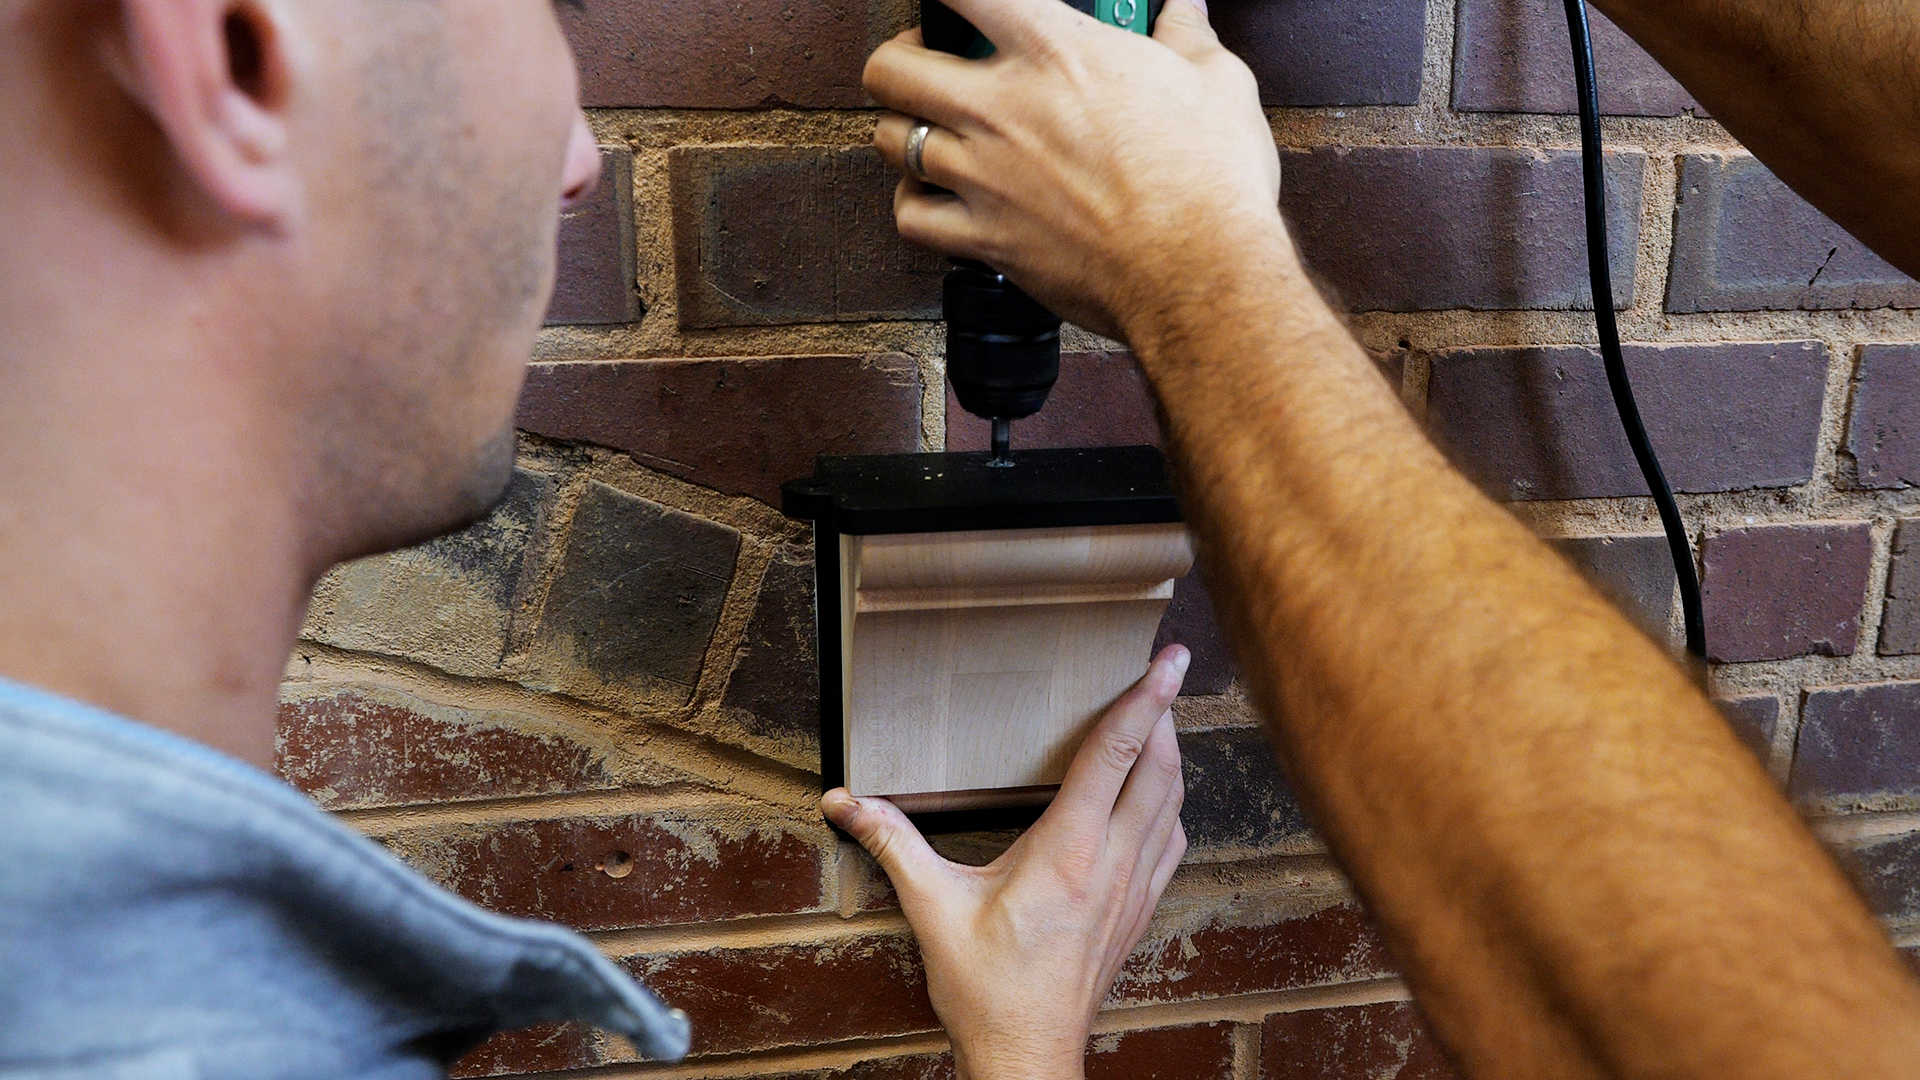
Starting with one metal mantel bracket, mark your pilot holes with a pencil.
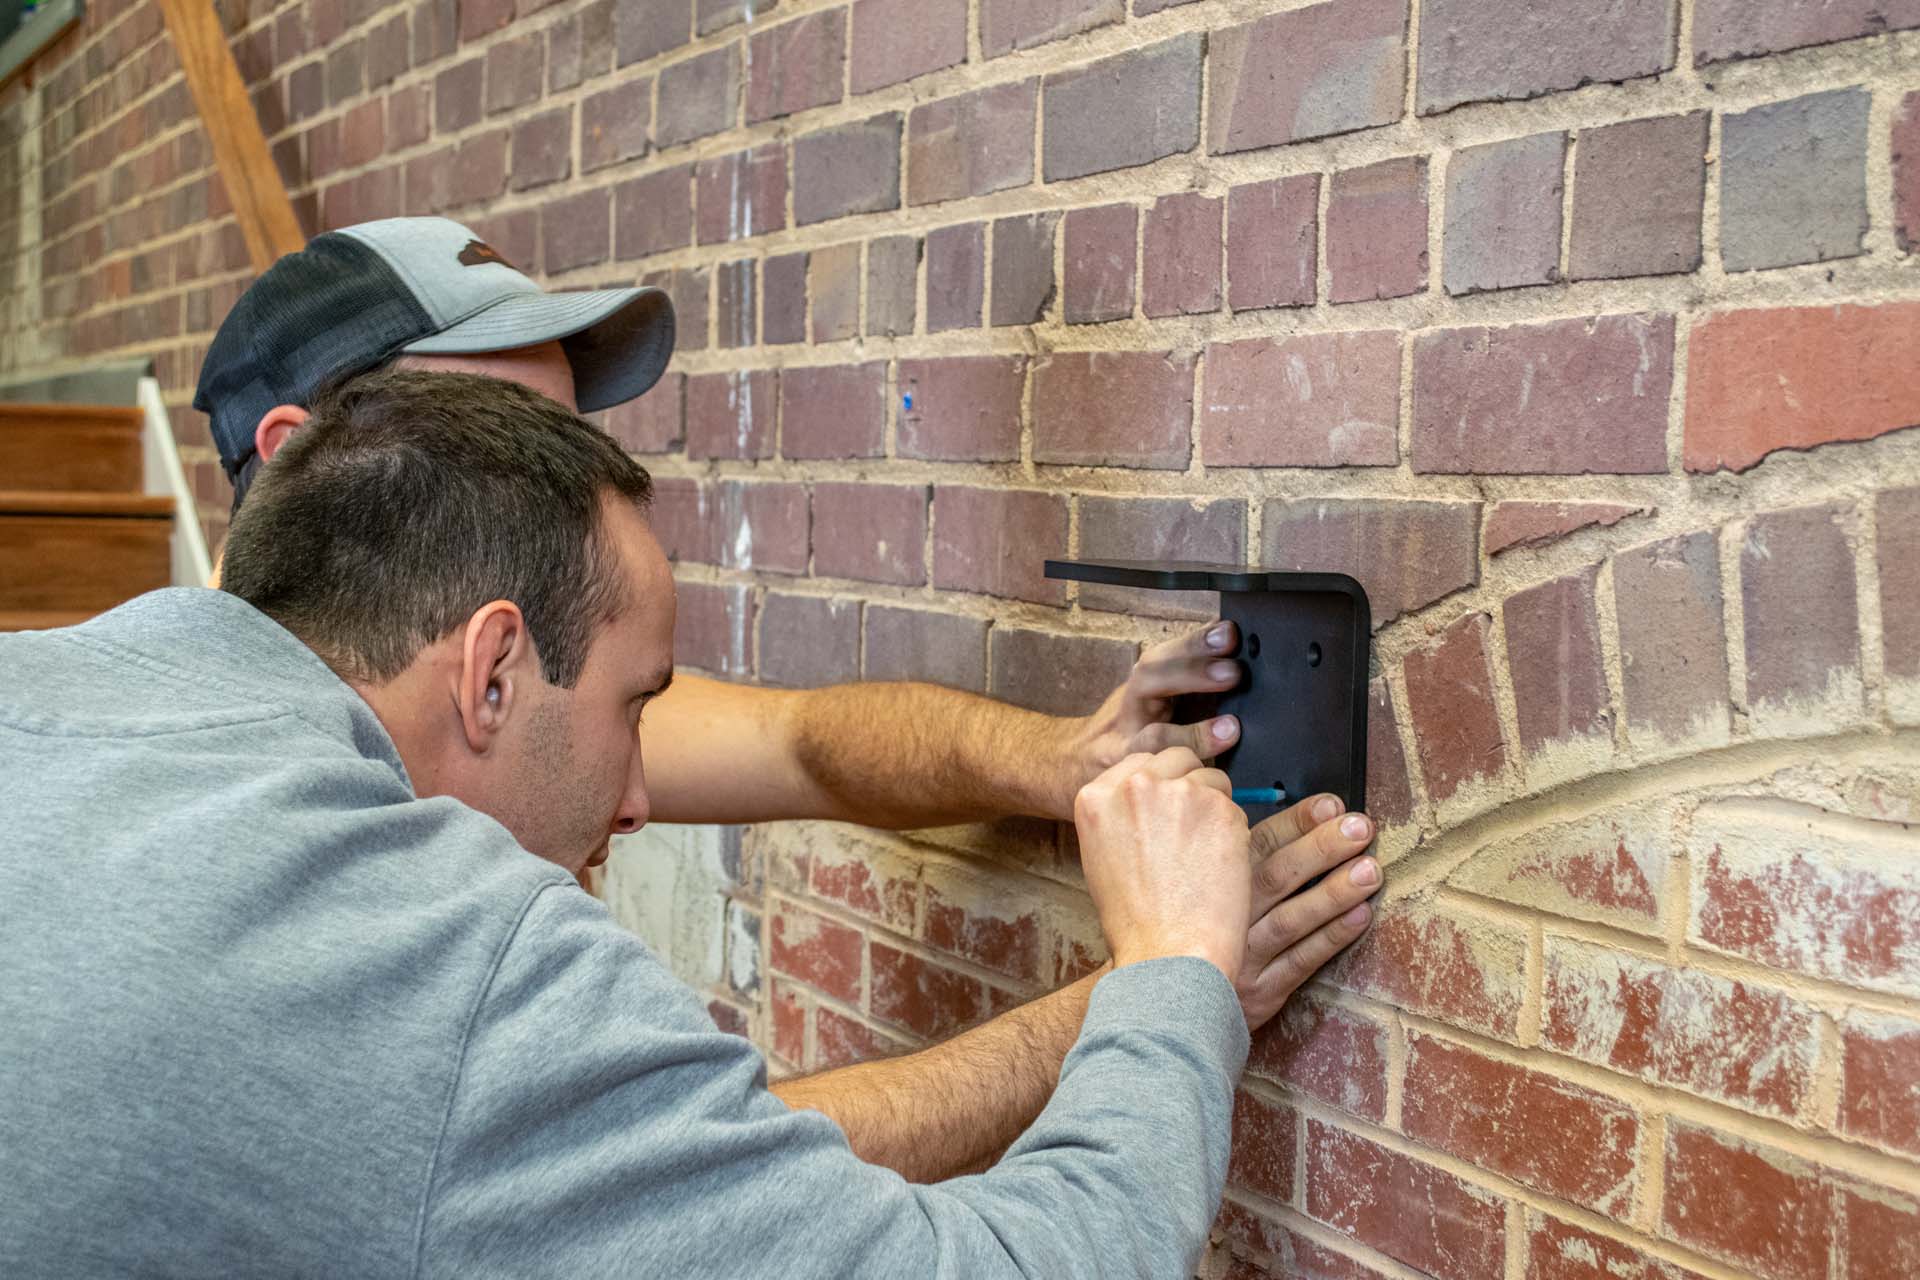
Proceed to drill them open, taking care to drill at least as deep as the length of the fasteners, but not too deep If installing into brick, be sure to use a masonry drill bit for this. If necessary, insert lag shields or concrete anchors, making sure the diameter of the hole is no wider than the wall anchor.
Now that any required anchors are in place, you can attach the bracket to the wall. You will want to use ¼” countersink lag screws or concrete screws for installation into brick or concrete.
Otherwise, use the recommended fasteners to fasten the bracket. Ensure its perfectly level both vertically and horizontally before fully tightening.
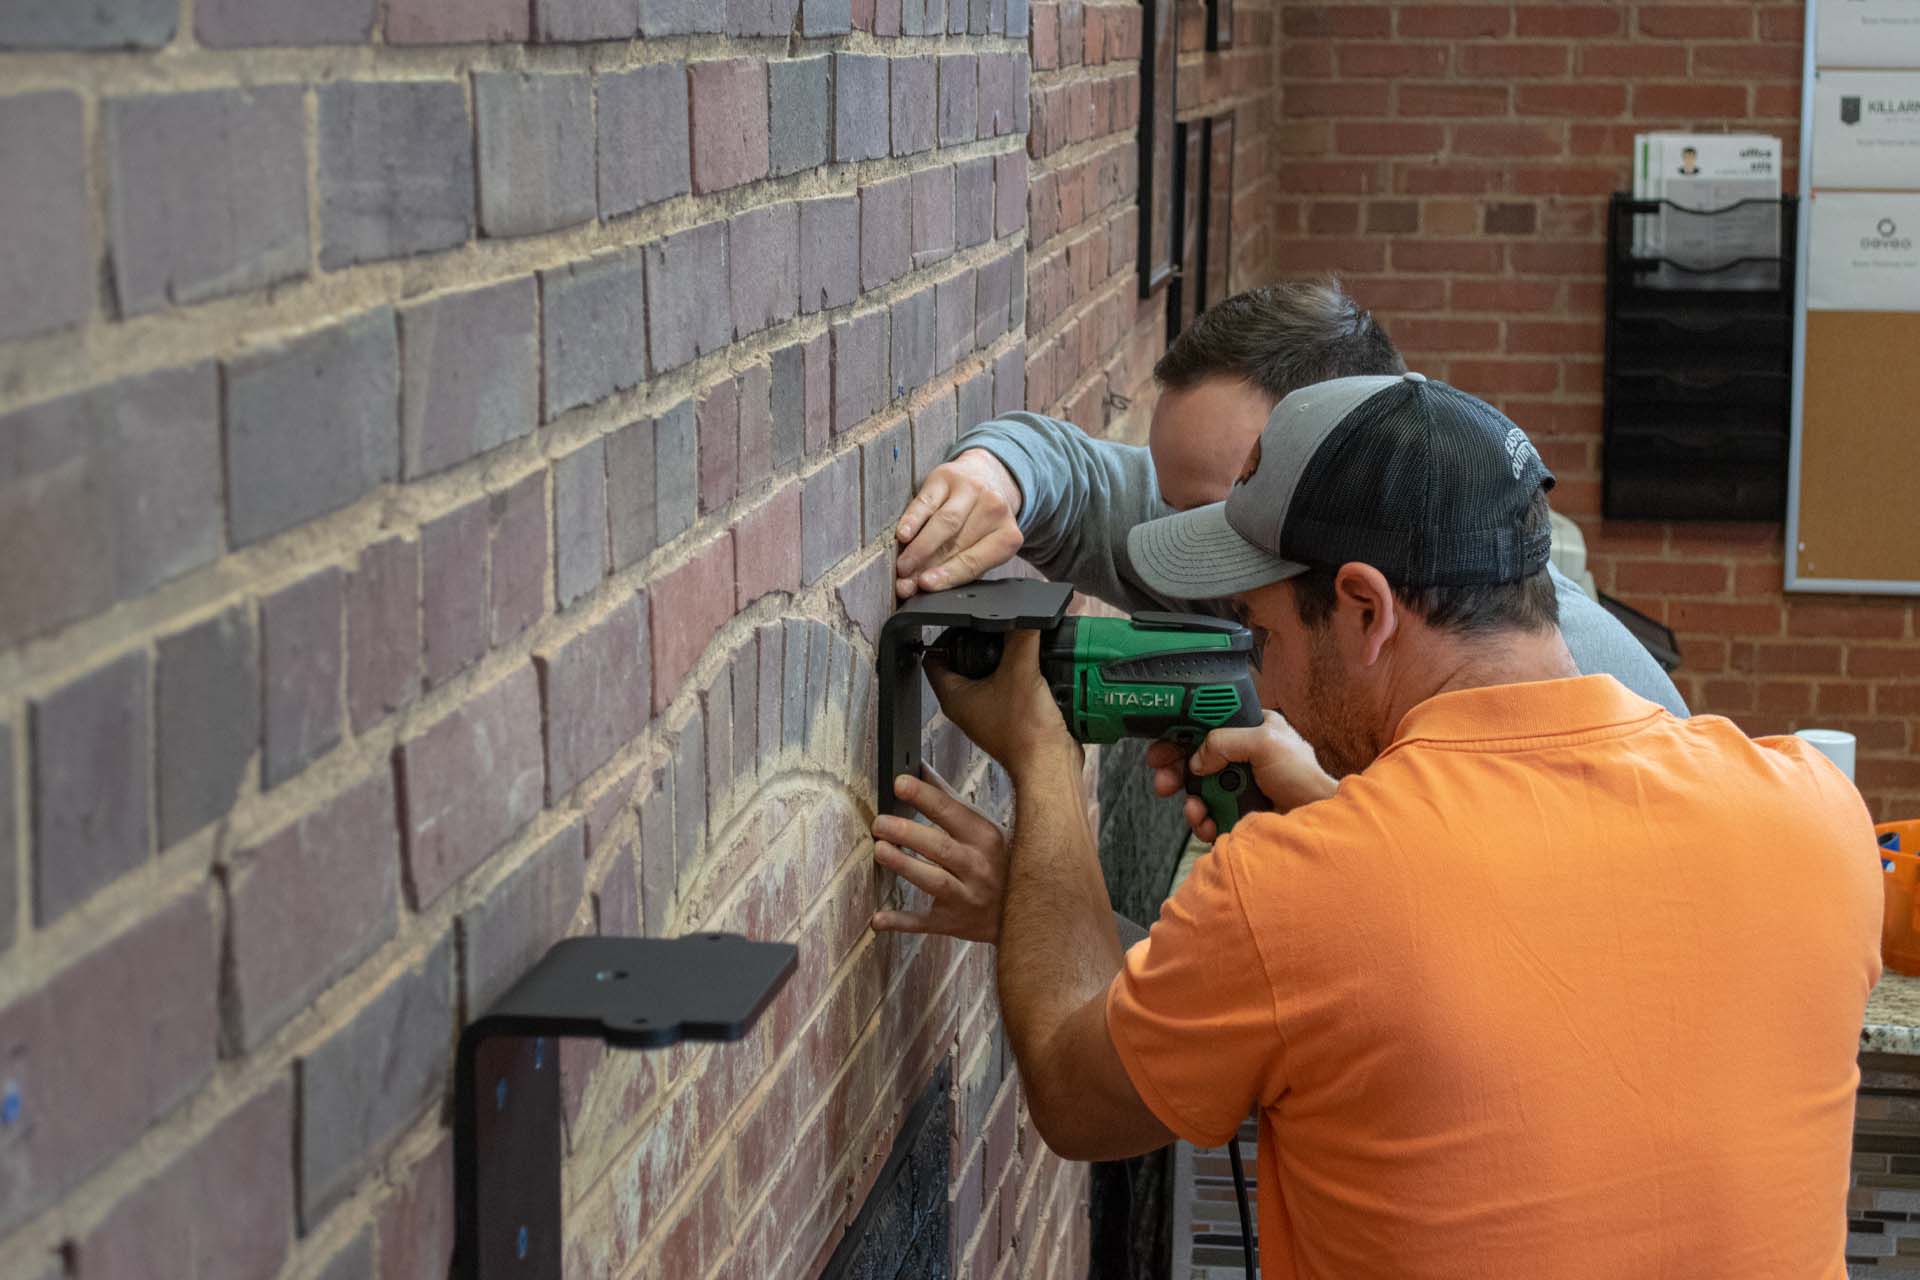
Repeat this process to mount the other mantel bracket, again checking it is level in all directions. Also, double-check to be sure your brackets are no more than 40” apart. Once you’ve finished hanging your brackets, wipe them down to remove any fingerprints or debris.
Preparing the Wood Corbels to Hang
If you so desire and haven’t already, be sure to apply any desired stain to your unfinished wood corbels before moving on in the installation process. While natural rustic wood corbels suit many decor styles, the opportunities are endless with wood staining or painting.
After applying the stain per the manufacturer’s directions, wait until the wood is completely dry before attempting to hang your wood corbels. The drying process may take up to a few days depending on the product you have chosen.
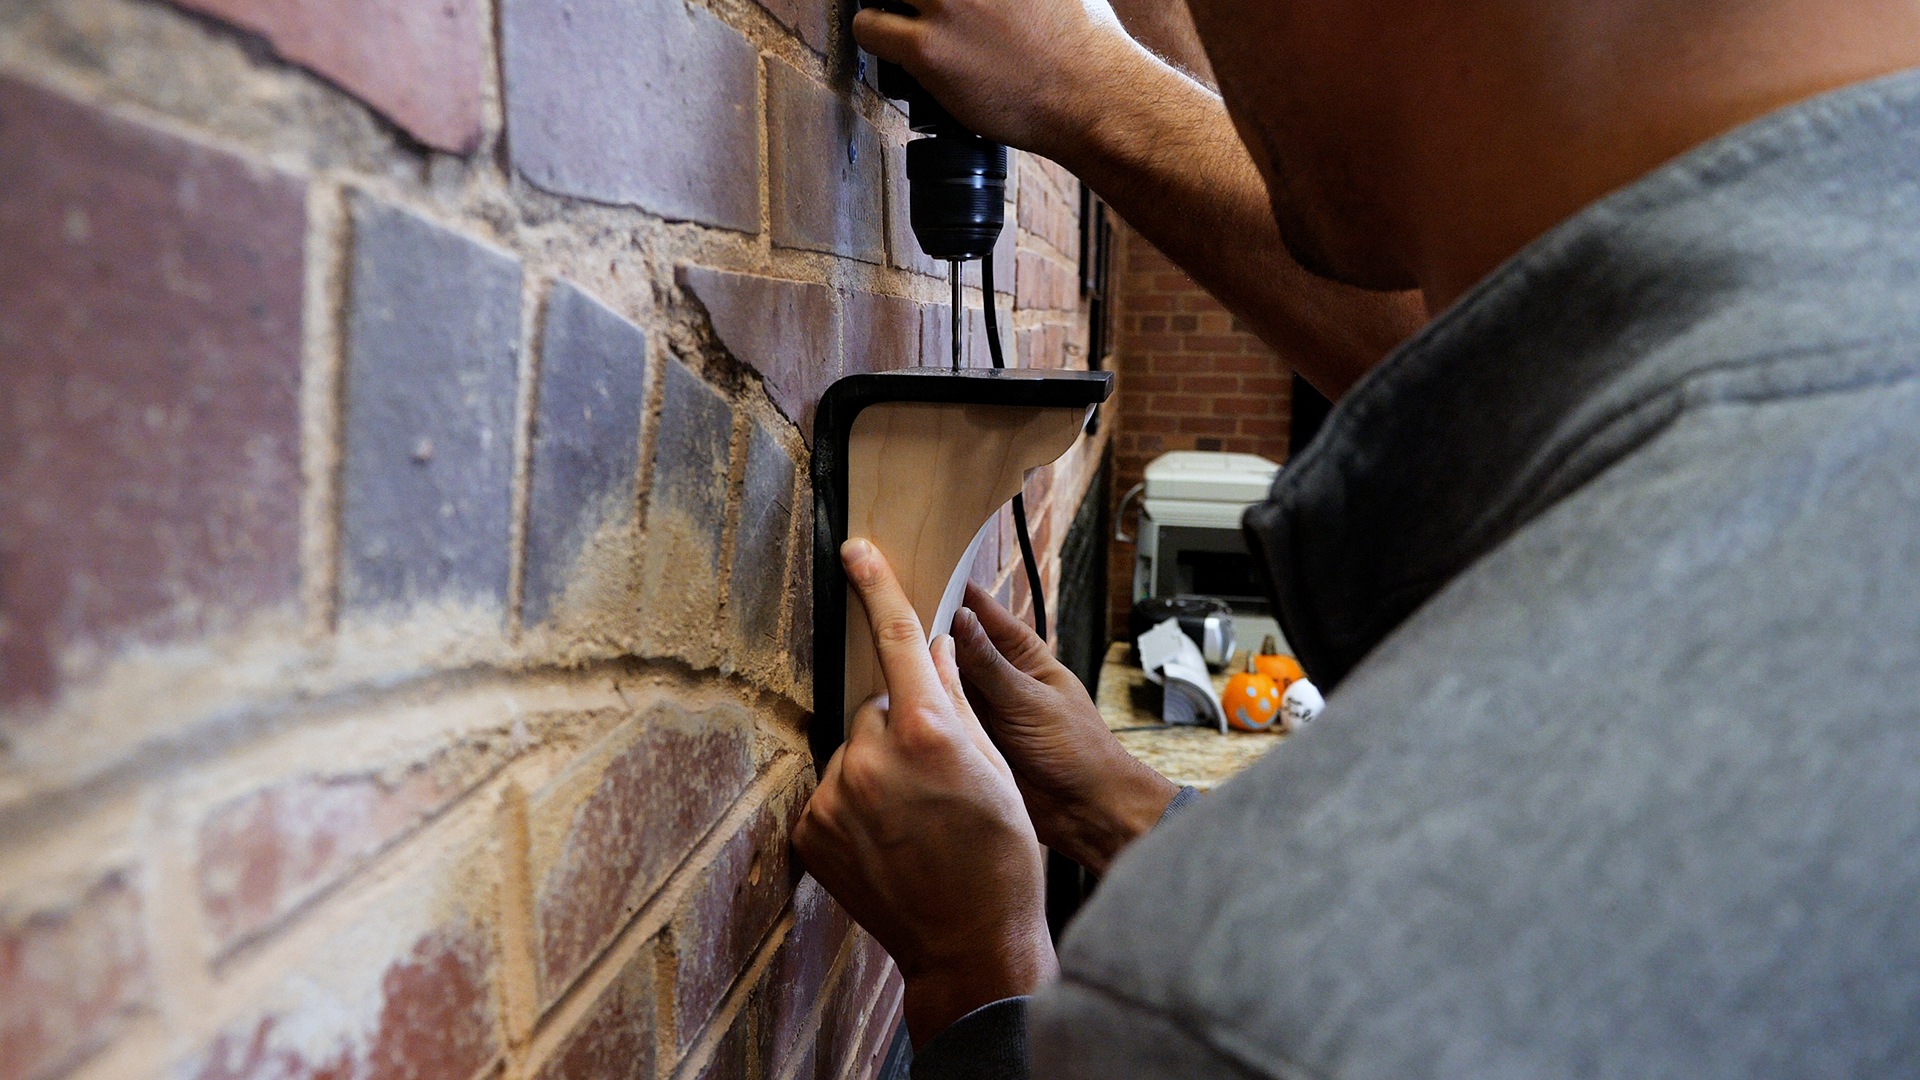
Attaching the Wood Corbels to the Mantel Brackets
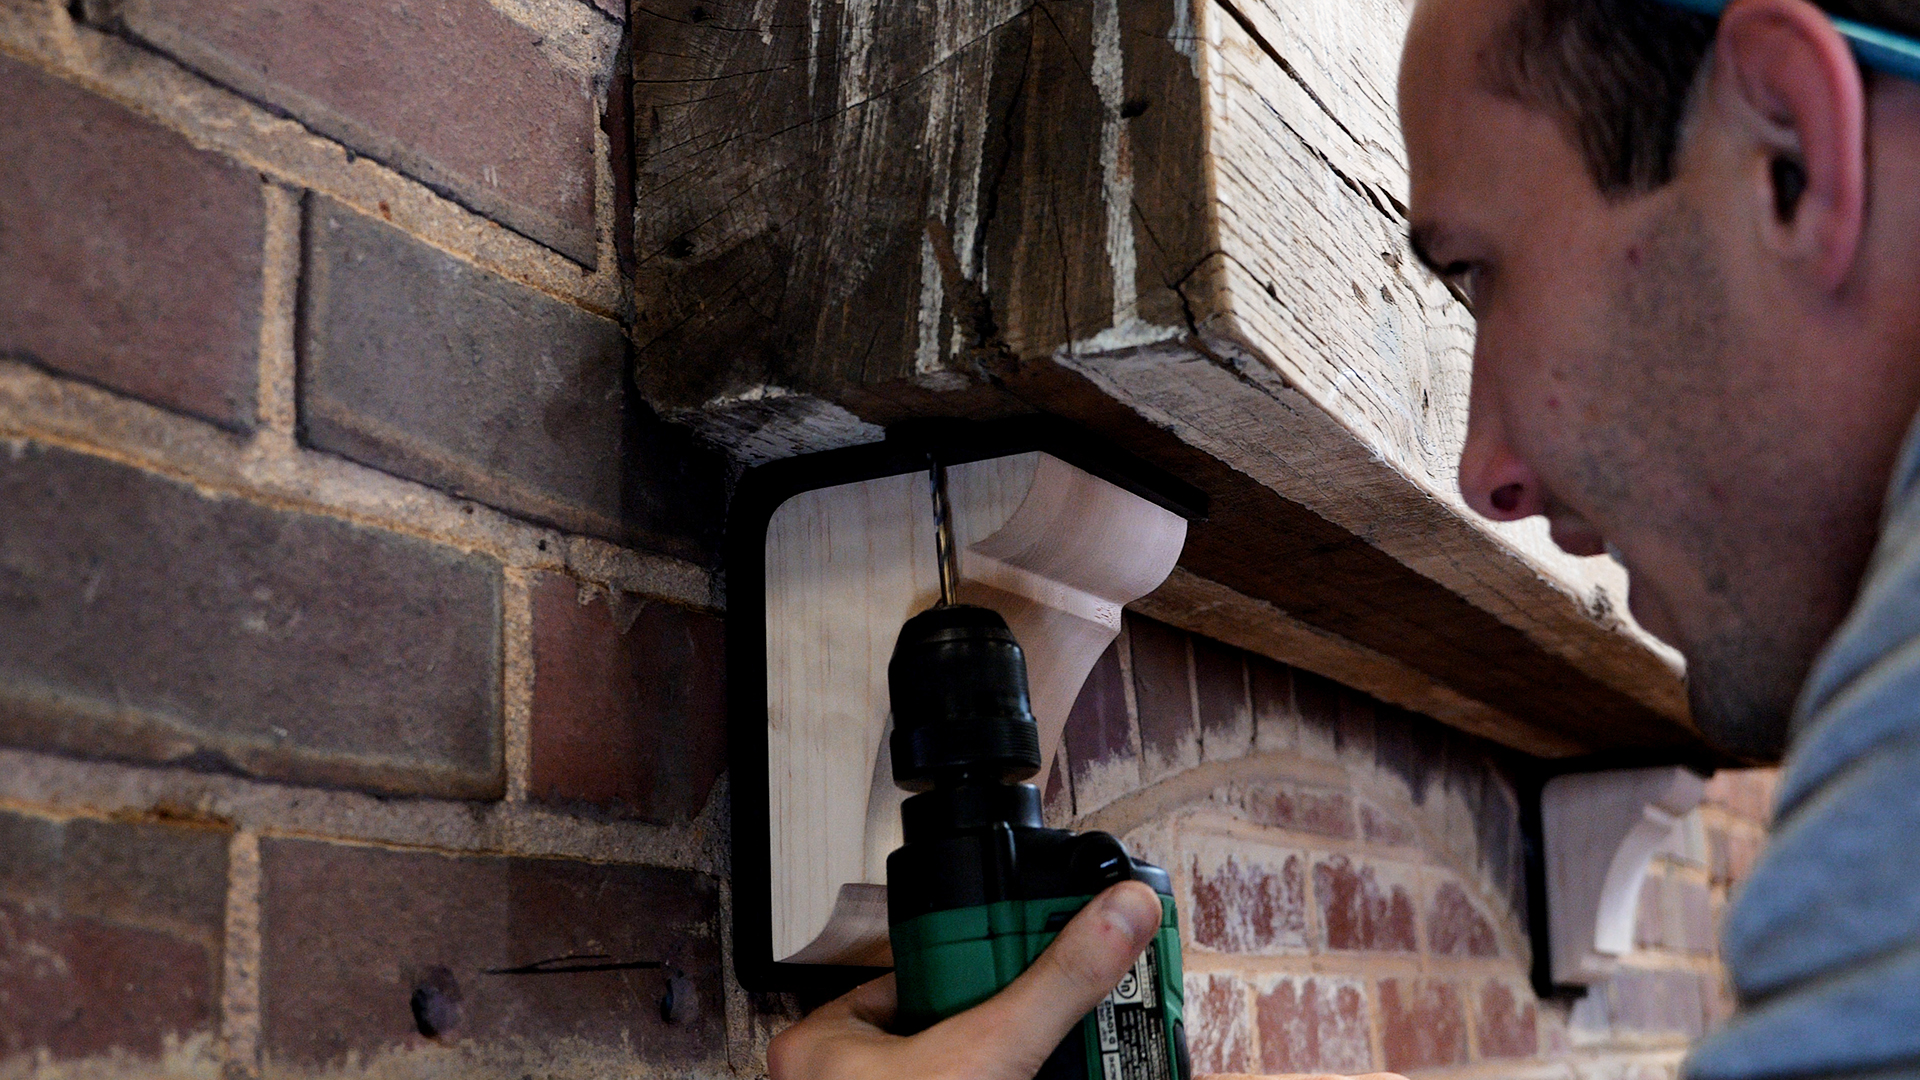
Once you’re satisfied with both the location of the brackets and the color of your corbels, it’s time to hang your corbels. Go ahead and mark the pilot hole position on the wood corbel using the template provided with your installation kit. You will then align the hole position on the top flange of the bracket to the corbel pilot hole mark you have just made.
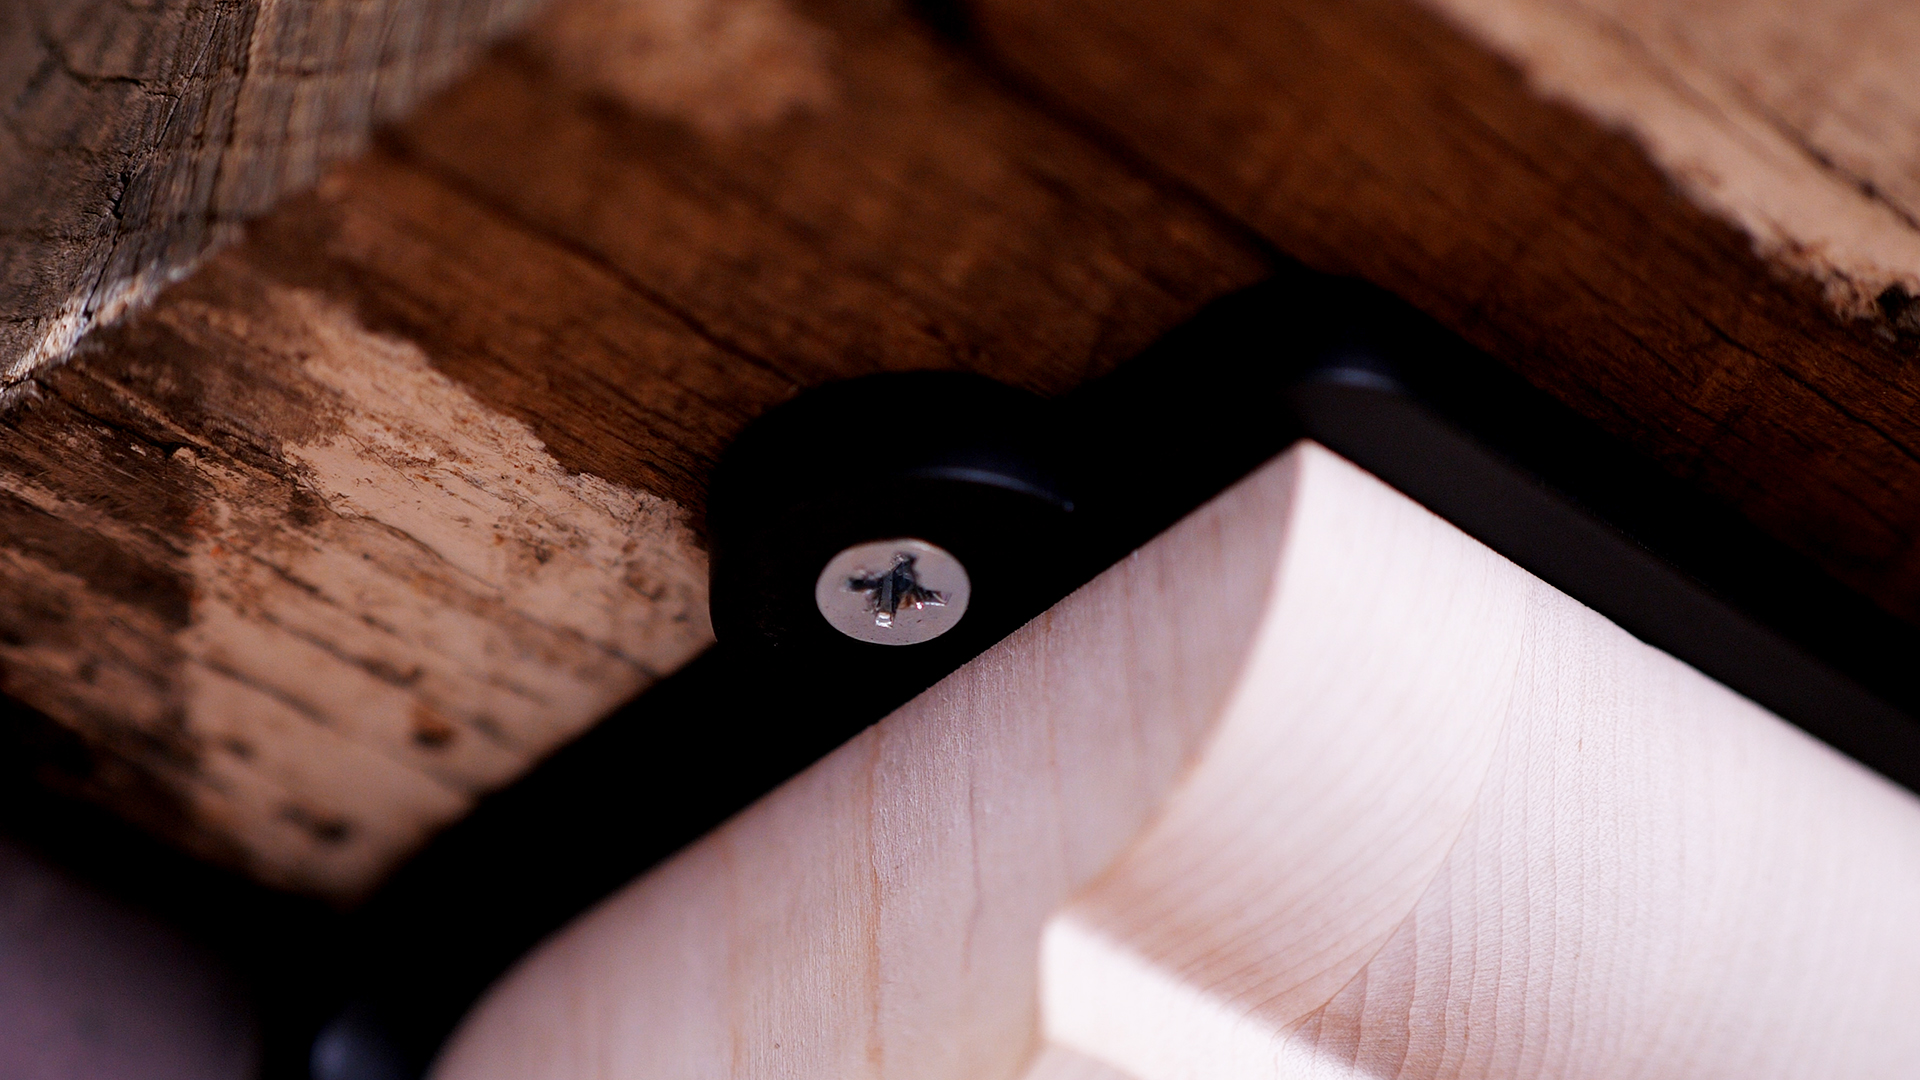
Now that you’ve ensured alignment between the metal bracket and wood corbel, you can proceed to drill the corbel pilot hole. Using a 3/16” drill bit, drill your pilot hole into the corbel. Then apply silicone or 3M tape to the backside of the flange to attach it.
Securing the Mantel Corbels
Before hanging your new mantel, the final step is attaching the mantel corbels to their respective metal mantel brackets. Using a ¼” countersunk 1” long fastener, secure the first corbel through the top hole. Repeat for each corbel.
Hanging the Mantel
Now that your mantel corbels are securely in place, you can go ahead and place your mantel on the mounting surface created by the corbels.
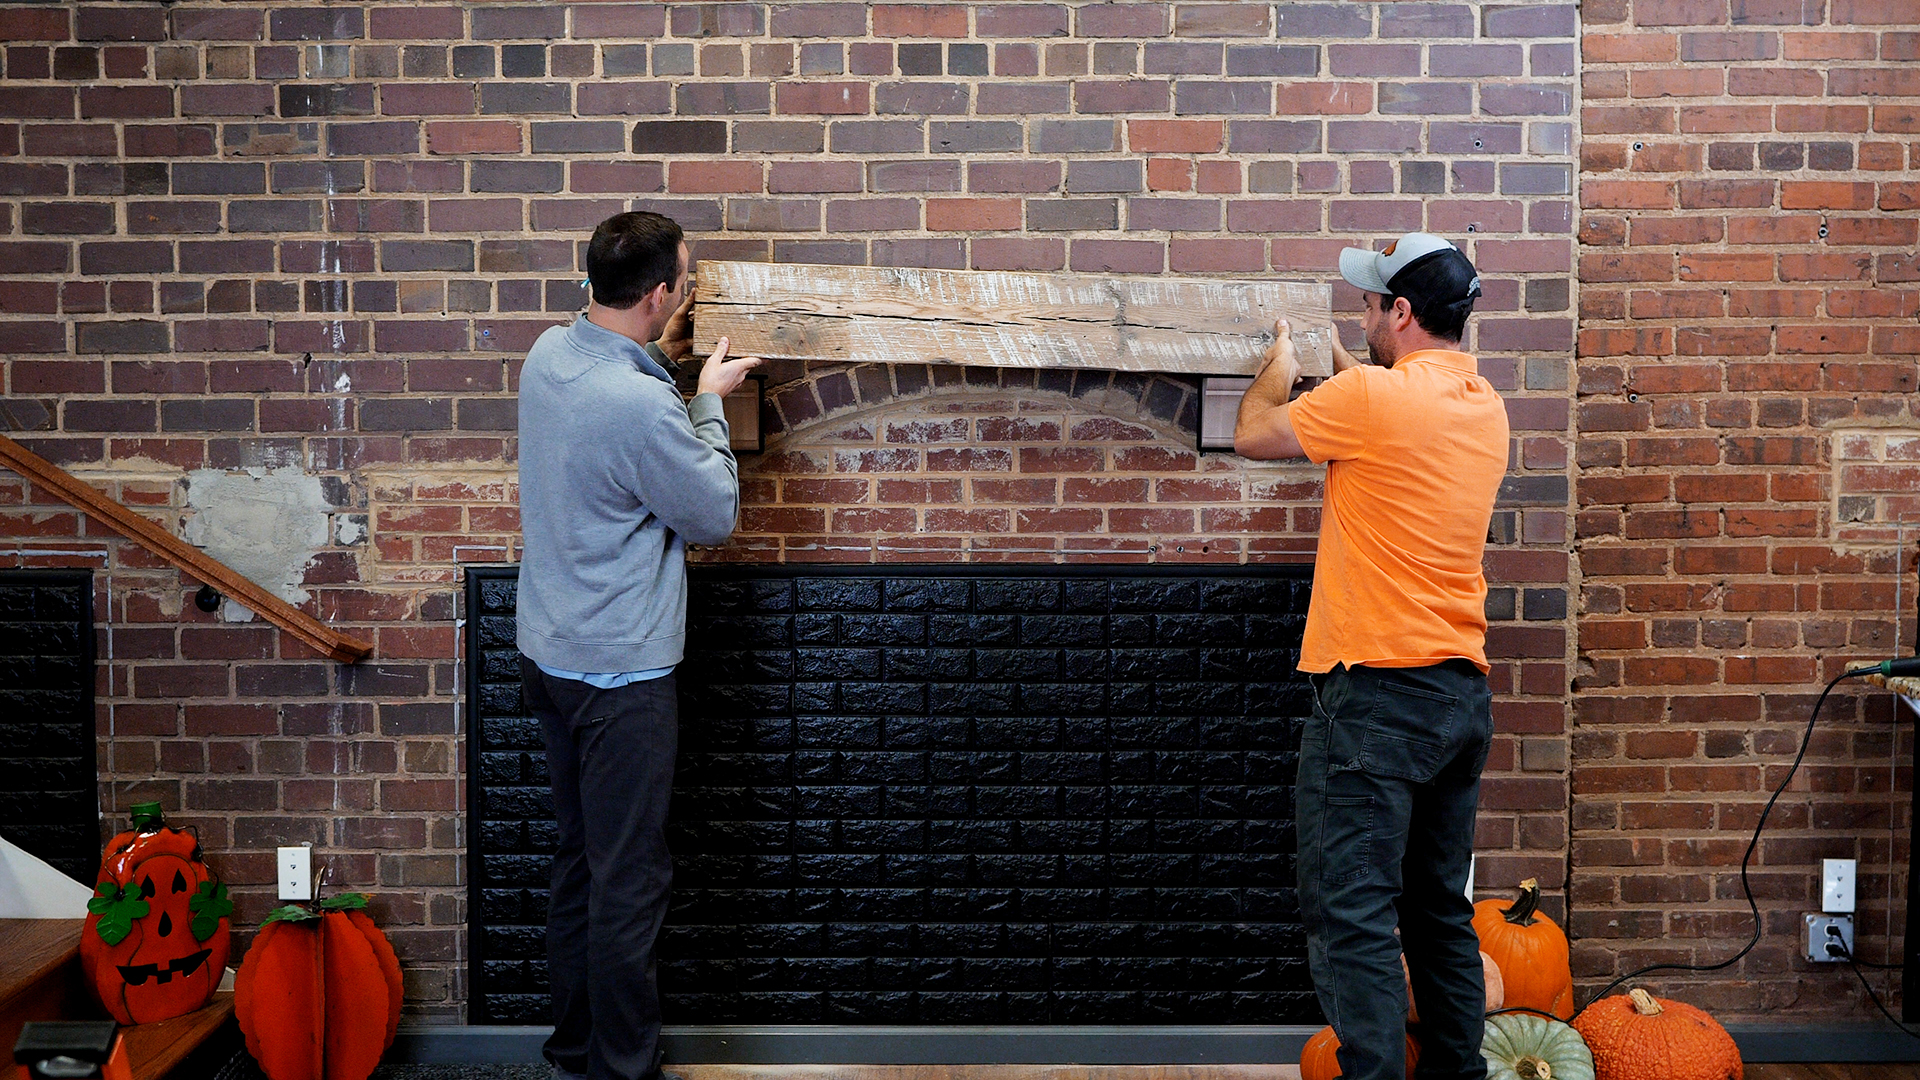
Then secure it with fasters through the bottom of the bracket into the mantel beam.
You then may choose to secure your mantel with silicone or caulk on the back edge. A silicone edge will provide some added stability and ensure no gap between your mantel and the wall.
Remember, your new mantel is only as strong as your installation and mounting substructure. For best results, be sure to follow all steps completely for a weight-bearing mantel. Now all that’s left is decorating!

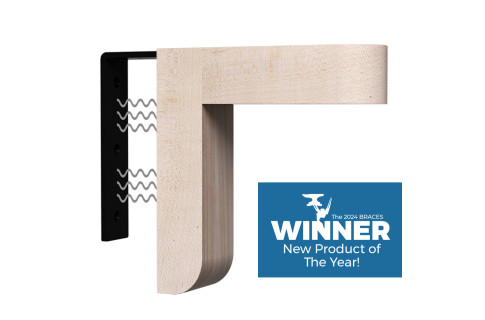
Mantel Corbels by Federal Brace
Federal Brace is excited to offer two gorgeous styles of mantel corbels to fit any home decor. Both our Blue Ridge Mantel Corbel and Crowders Mantel Corbel are mounted the same way, so you can be sure that whichever you choose is simple to mount. For more guidance, please check out our installation video.